9 Minute Read

9 Minute Read
Let’s get that out of the way, shall we?
The website Dangerous Roads actually calls this one “inhumane”, as there are several 20%+ gradients throughout its (total) 4.6 mile length. Another detailed blog post on the climb calls it “forbidden”.
In all honesty, this one was more of the most difficult rides I’ve ever done in terms of its steepness. I felt similar to how I felt climbing the Mortirolo in Italy, although the steep portion of this one is not nearly as long.
Strictly speaking, there’s a gate out there that you’re not supposed to cross, but hey, nobody seemed to mind when I was out there!
For the full route we did that day, see my Strava ride.
The mountain is technically part of Chula Vista, a neighborhood south of downtown San Diego, and you can get there from any myriad of ways. My friend with whom I began my cycling hobby with drove down to meet me near North Park, and we began to head a bit south and east, out towards Rancho San Diego.
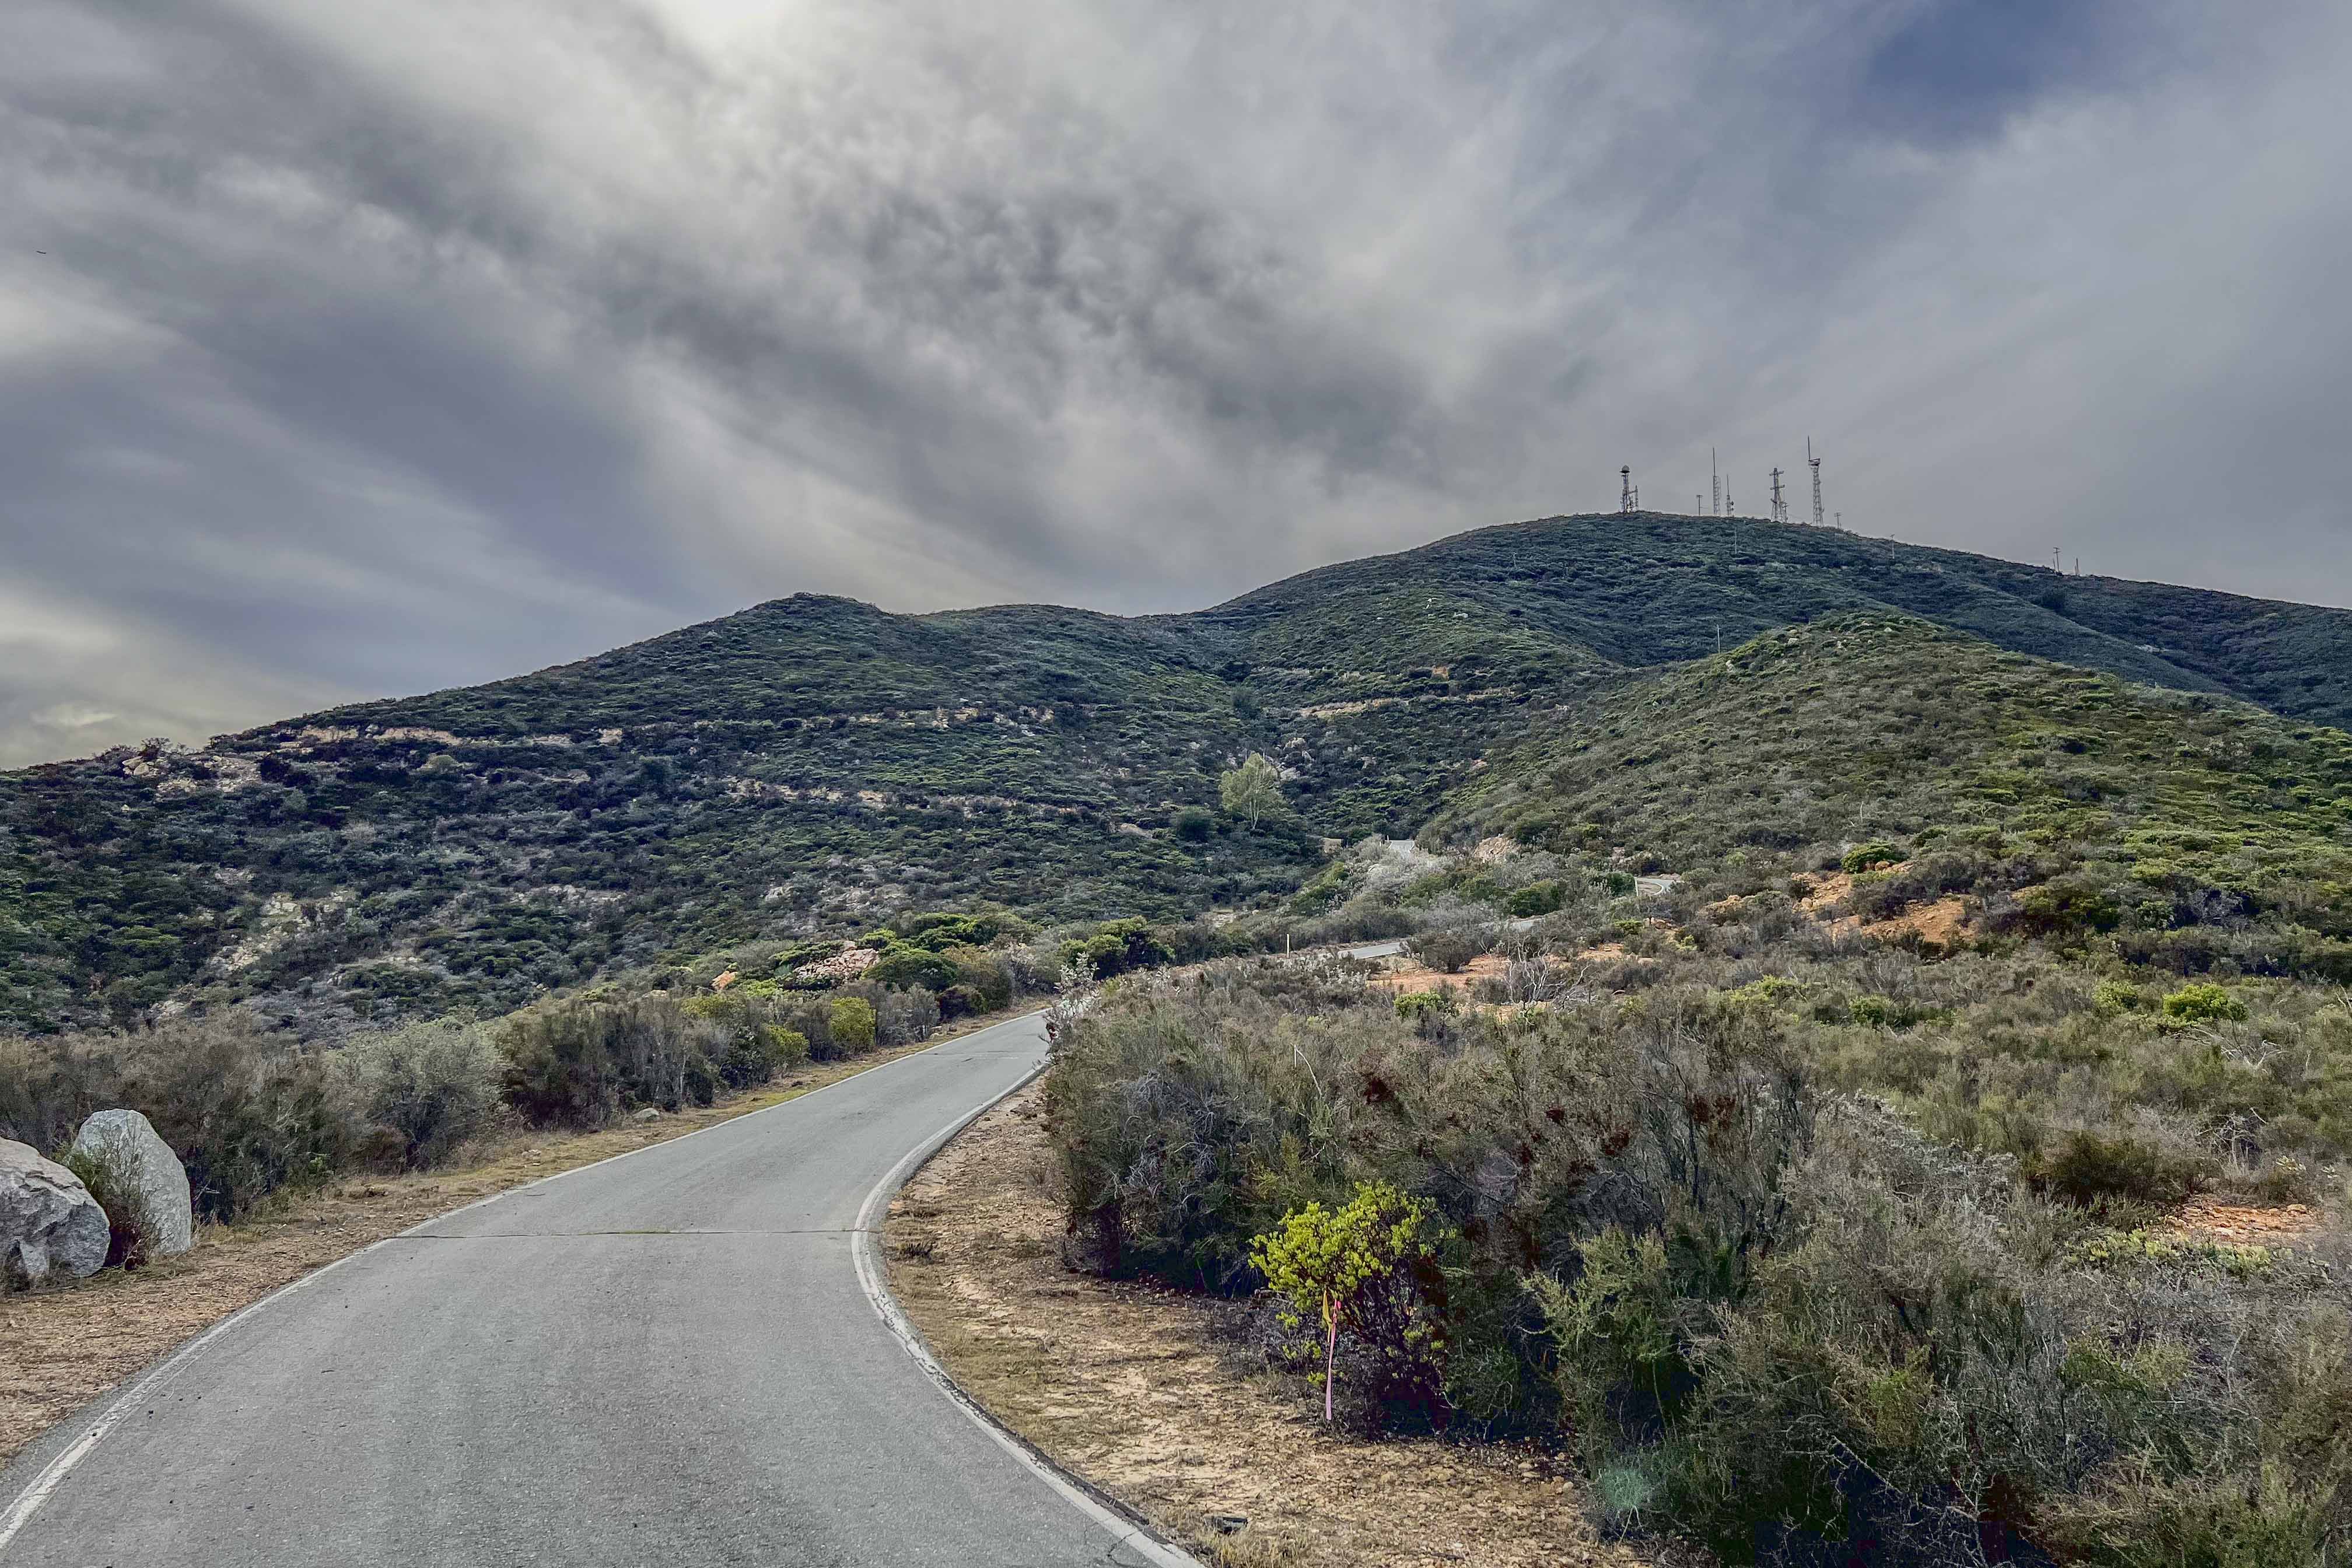
Funny enough, you can see the radio towers at the top of San Miguel from all over south San Diego county, so it was a bit of a shock that I hadn’t actually been up here previously. When you get closer, though, it looks far more imposing!
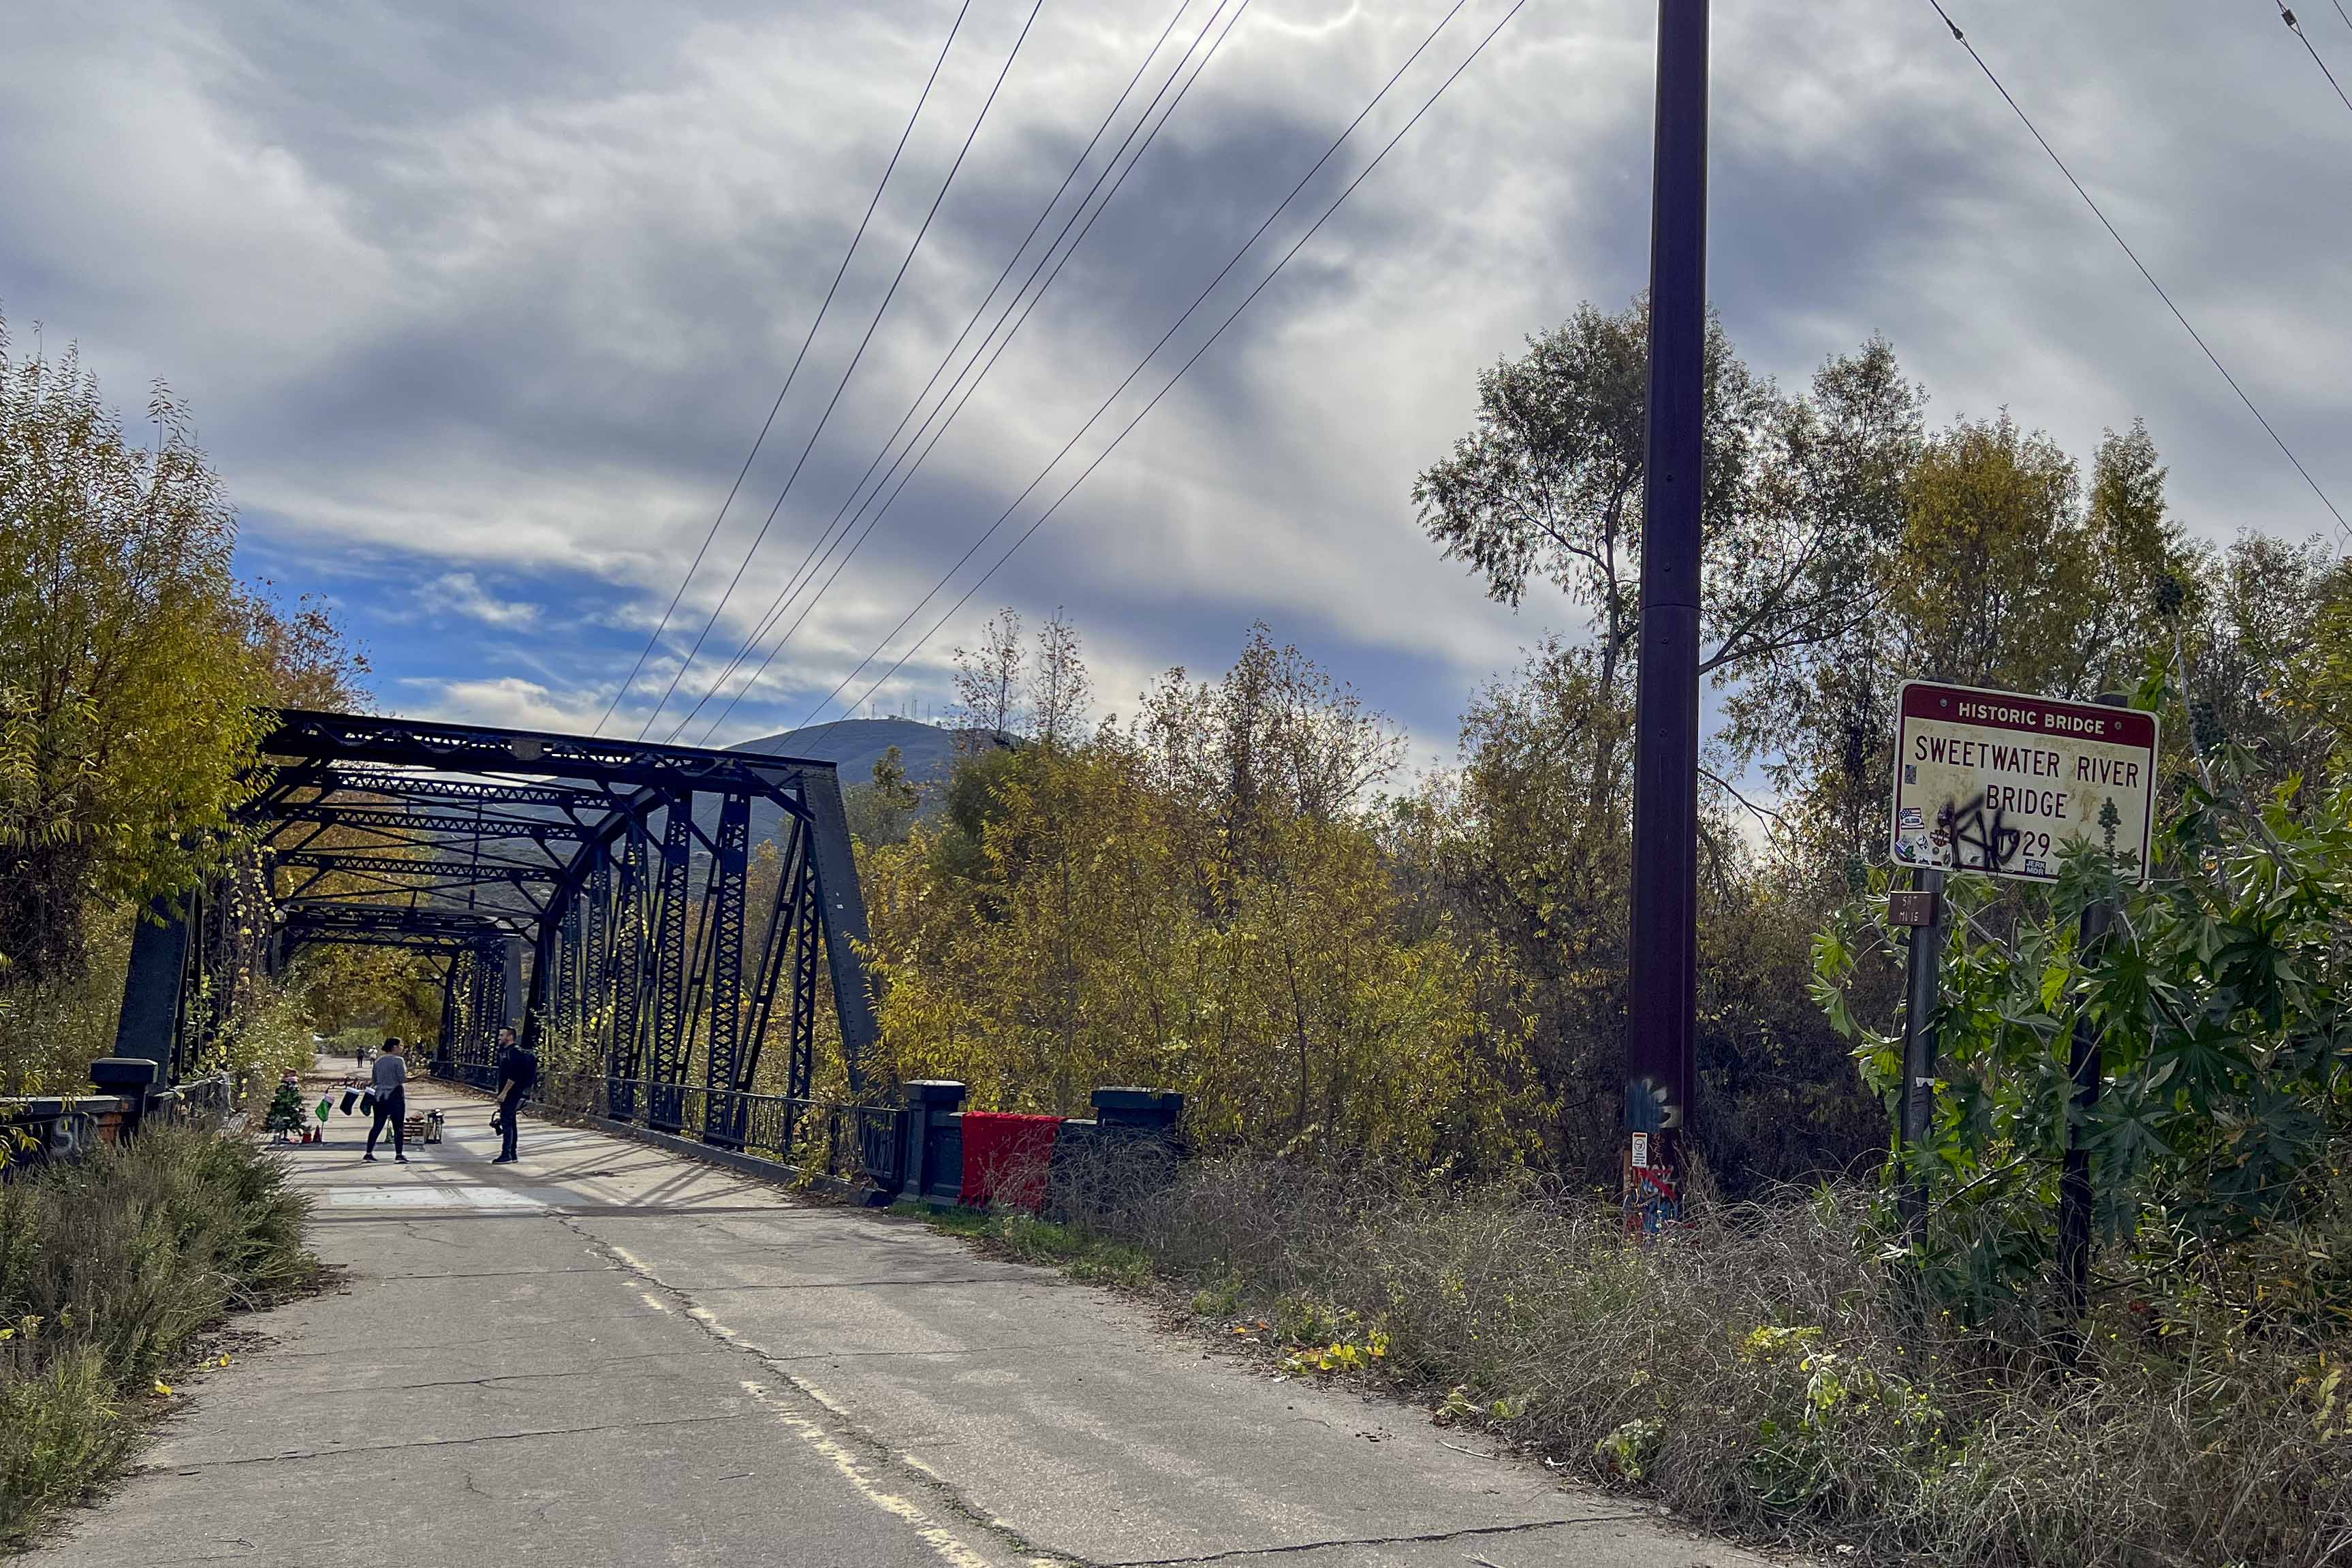
Once descending down from Jamacha Junction (a large shopping center), take the first turn to follow the parallel road just prior to the trailhead parking lot. You should definitely check out Sweetwater River Bridge, as it’s an old steel bridge that cars no longer go over.

We met a curious character when we stopped here, who was finishing up a mountain bike ride. He greeted us with “ah, the real men are here” and then proceeded to ask us about our road bikes. He was decked out in Sock Guy kit, as apparently he “knew a guy who knew the Sock Guy.”
I always enjoy the random interactions I have with people while riding!
I think it’s best to divide this climb into three parts.
This first part begins right as you leave the parking lot and head out through an open section of land at the base of the mountain. It is a relatively well traveled road, so the road conditions are generally good, and it’s a fairly straight road sloping upward, disappearing a bit around a small saddle of the mountain.
However, this section is quite a bit steeper than you’d think, considering that it’s what I now consider “the warm up” to the actual climb. It’s definitely not easy, and took me by surprise, as I wasn’t expecting it to be that steep so soon. The good news here, though, is that right as the road bends around past where you can see it, it levels out.
This whole section actually reminded me a bit of climbing Tre Cime di Lavaredo in Italy, as that one starts with a pretty brutal climb before leveling out, lulling you in a false sense that you’ve accomplished the steep stuff already - when you definitely haven’t yet!
Luckily this one isn’t nearly so tough, but be ready for it anyway.
Just as Millar Ranch bends around the small saddle on the slope of the mountain, you come to a dirt road and a small parking lot where you can see hikers and mountain bikers getting ready for their own adventures.
Luckily the (now dirt) road levels out through here, and you pass by several homes situated along the road, each with their own view of the mountain top. Dogs will likely bark in your general direction and you’ll likely see some goats at one of the houses right towards the end of the road.
Follow this (bumpy) road for a little bit and hang left when you have the option to do so. Here is where the road descends down through a ravine, one that is regularly flooded out and often very muddy. It’s also where the Google street view ends.
Luckily there were no recent rain storms, so the road was fine to get through on our road bikes. Be mindful of this, though, as this could quickly make your roadie adventure turn into a sloshing gravel / MTB one! Even in dry conditions, we found the dirt to be fairly slippery for our 28mm tires.
Just after the ravine, there’s a short, steep ascent that leads you right to a solid white gate and several signs.

If you choose to ignore the signs and continue upward, grab your bike and hoof it over the (suspiciously) low rock just to the left and try to quickly clip back in on the steep starting pitch just on the other side.
This is where things get interesting. Luckily it is paved with reasonably good asphalt all the way to the top.

It’s incredibly beautiful up there, but it is steep. Like, 10%-15% pitches at first, then an extended stretch towards the top with 18% stretches and 20%+ pitches in between!
What also makes the ascent interesting (and the descent more interesting) are the many “speed bumps” across the road, likely used to divert rain water more than to slow down traffic through here.
On their own, they’re just small bumps, but when you’re already standing on your pedals at 45-50 rpm because it’s, you know, a 20% gradient, they become quite the challenge.
The last kick-in-the-teeth that this road throws at you is mostly towards the top - a straight stretch that starts at about 12% and ends up rounding the mountain at nearly 21%. Not fun. Be ready for this one! What makes it even more difficult is the fact that you can see the road go straight up into the sky above you, which really gets into your head.
I remember this section almost breaking my forward momentum as I briefly contemplated stopping. Well, “briefly” combined with “multiple times”. Luckily I was able to slow my cadence and tried to relax myself as much as I could while stomping on my 34x30 gear, relying on gravity pulling on my legs. Basically I tried to not think too much about the burning question of “how much longer is this insane road going to be?” and take each pedal stroke at a time.
Once around that bend, finally it levels off a bit. It also grants you your first close up view of the radio towers, which at this point feel like they come up out of nowhere. Once there, I found myself excited, but also relieved, knowing that the top was only around the corner!
And what a view at the top!
As long as you’re relatively well trained, these kinds of climbs end up becoming more of an exercise in mental fortitude. Whether or not you can make it is never really an unknown to you at that point, it’s more about how fast you’ll make it up the climb. I’m lucky with my power to weight ratio in that, despite my FTP not being over 4w/kg, I can ascend steep climbs somewhat slowly while also not requiring me to dip too far into the red.
At least for now. But this one really taxed me! It’s a great climb if you’re up for it though. I can absolutely recommend it if you’re willing to go beyond the gate at the bottom and ignore the signs.
Honestly though, I saw NO ONE up there besides my buddy. It felt so remote and so quiet, and as long as you’re respectful, I see no reason why the signs should prevent you from attempting the climb.
In short, I really hope you have disc brakes! I almost named this ride on Strava “RIP my brake pads”.
Definitely try to feather your brakes a bit to keep their wear to a minimum, but most importantly, don’t let the speed get ahead of you! The speed bumps mentioned earlier will definitely come up quickly, and since they’re angled across the road, try to hit them as close to a 90 degree angle as possible.
Or if you’re SAFA Brian, you can just bunny hop them (seriously, don’t do this).
Slow down, take some pics, savor the accomplishment, and make sure to remember that there’s a metal gate blocking the road at the bottom. You should see it from relatively far away, but don’t forget about it!
If you choose to follow the ride we did that day, please be careful when heading east after Jamul. I don’t particularly recommend this route! I routed us this way because I wanted to ride Otay Lakes Road from the east, which is a road I’ve ridden previously to Lower Otay Lake from the west.
To be fair, I really did like riding along the lake.
The road east of the casino is basically a highway for cars (it’s the 94 highway, which can take you almost to Ocotillo!) with no bike lane and no shoulder for most of it. It’s relatively flat and downhill in some sections, so we were able to get through there fairly quickly…but it’s not something I would want to do again.
I utilized all my previous route planning tips and tricks and still got slightly blindsided by this one (for some reason the Strava Heatmap shows this route as being highly traveled by bikes).
If you want to continue to Mexico to see the border wall for yourself (spoiler alert, it’s kind of intimidating), I’d recommend at this point to go back out through Jamacha Junction and head around the mountain the side we came in on. From there, you should be able to connect back up with the route we took, past the amphitheater and the air field, through a set of neighborhoods, and then onward to the pedestrian gate at the border.
To get back to San Diego, there’s a super handy trolley that will take you all the way back for a nominal fee! They allow bikes on it, too, even though there wasn’t really anywhere to stow them (we held on to them the whole time).
After climbing San Miguel, you definitely owe it to yourself to get some tacos! They’re amazing down there, trust me. Worth it.
