
17 Minute Read

17 Minute Read
Last weekend, I had the chance to ride with some friends through some incredibly steep, but beautiful terrain in the Santa Cruz area.
On the way down from a huge descent, I heard something very suddenly that all of us cyclists hate to hear. The sound of air leaking very quickly from my rear tire.
I had a massive blow out.
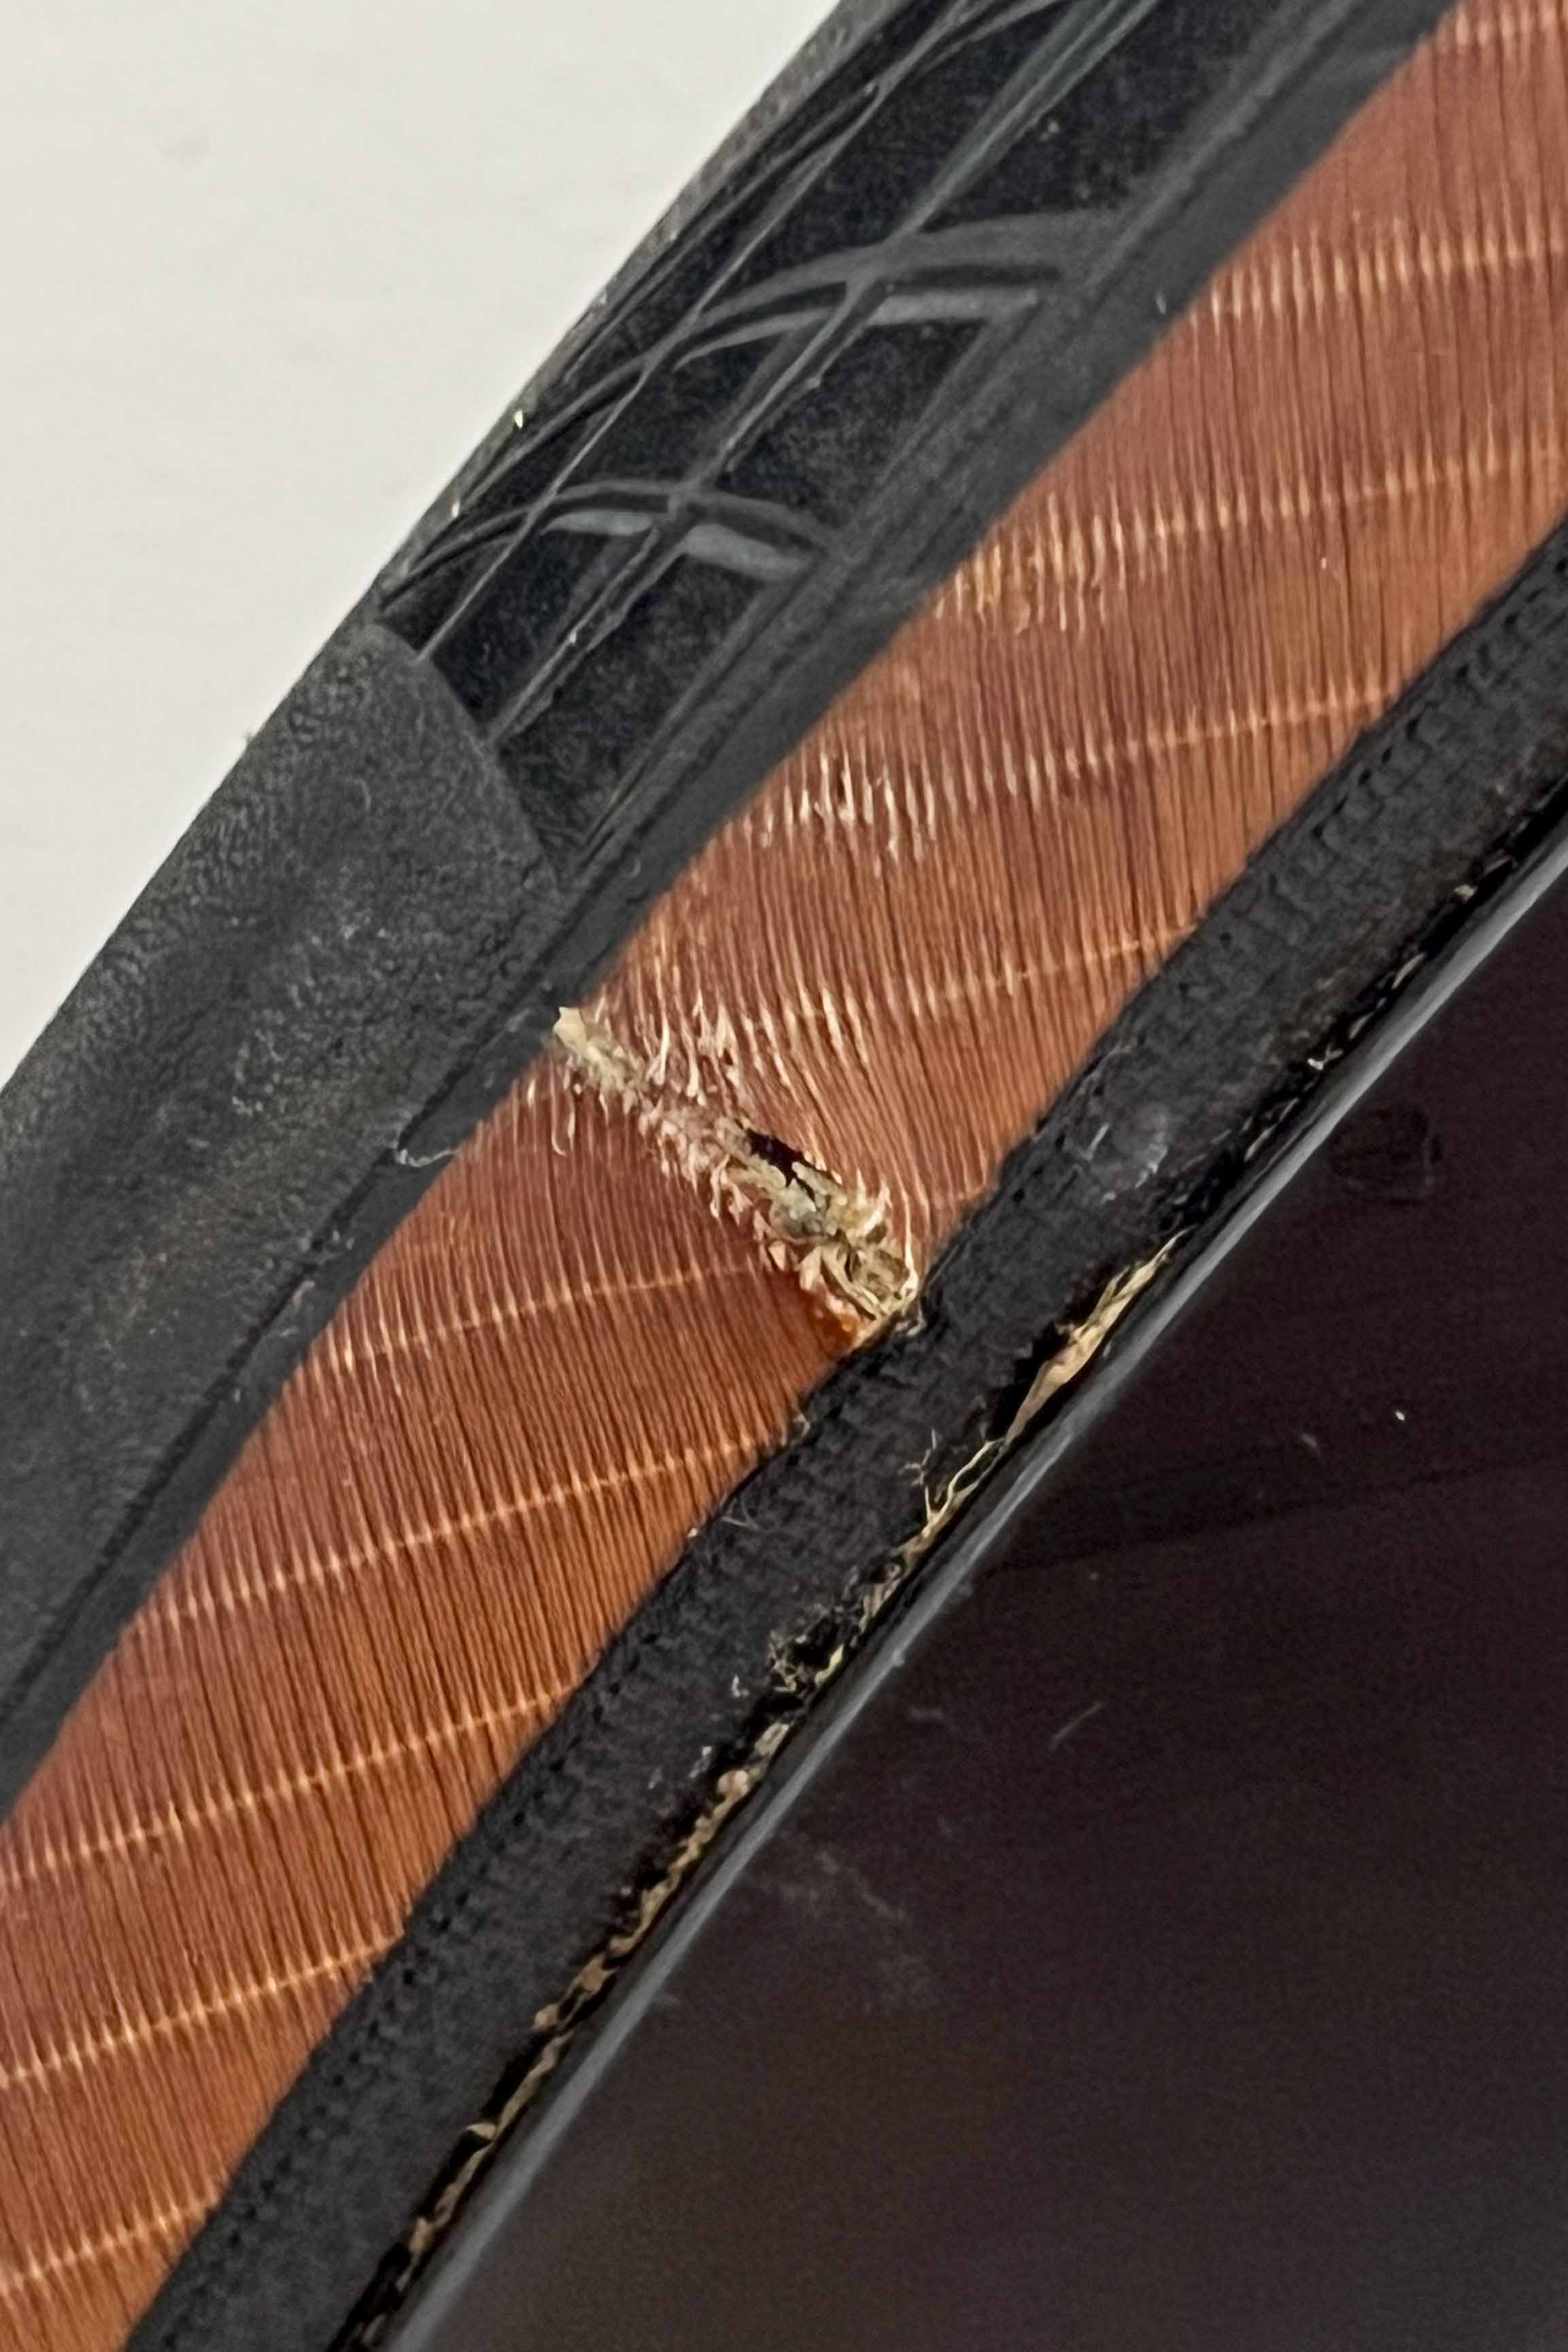
Turns out my tire basically just failed. As seen above, the sidewall basically gave way and split right along a seam (there’s a tube placed inside there in the picture). Likely a defect in the tire of some kind, because the tires aren’t even that old and probably had less than 500 miles on them.
They just do. What bothered me more when it came to this particular issue was:
I got lucky on that last part, as one of the other riders I was with let me use their CO2 inflator and a canister to fill the tire. That way I didn’t have to use my hand pump to do it all myself. I can only imagine the possible heat exhaustion from doing so!
In retrospect, some of this could have been mitigated with some additional prep on my part, but that’s where I have a lot more to say on the topic.
By way of introducing this controversial topic, let’s define what we mean by “tubes” and “tubeless”.
In the case of “going tubeless”, it’s nearly 100% inferred that you will be also using sealant inside your tire. This is a liquid substance that floats around your tire that effectively “clogs up” holes in your tire if and when they ever occur when you roll over something sharp.
Sealant works this way due to the higher pressure wanting to escape the tire to the outside in the event of a sudden puncture. But with a liquified substance “in the way”, the (thick) sealant actually plugs up the hole as it coagulates around the hole.
If the hole is large enough or the sealant isn’t very good, a bunch of excess sealant will spray outside of the tire on to your components and legs before enough sealant has a chance to actually stop the leaking air. Additional air usually then needs to be pumped back into the tire to make up for the loss in pressure.
An additional and important thing to note here is that for all of this to work properly, the sealant has to be in liquid form. If it’s not liquid at the time the hole occurs, the sealant will not properly slide around to the spot in your tire currently spewing air. It will also not plug up the hole.
While every sealant out there is effectively attempting to do the same thing, they each tend to do it differently, i.e., better or worse, than others. A few brands that I have used in the past are (affiliate links included if you feel like supporting my work here):
In my experience, the Silca and MucOff brands tend to last longer in the tire in liquid form. The general guidance is something in the vicinity of 3 to 6 months, depending on use, as a stationary tire will often dry out faster than one that’s being actively used.
One of the major and most important differences between each of these brands and styles of sealants are how long you can go before having to replace or “replenish” it inside your tire. Over time, it dries up inside your tire, making it ineffective at sealing up holes when they occur. I’ve actually had sealant “ball up” and roll around inside the tire, something you can hear when spinning the tire around at home.
To “replenish” the sealant in a tire already mounted to your wheel, you usually have to remove the tire and add more sealant into the tire. You can choose to clean out the dried sealant if you’d like to remove the “excess” weight, but it’s an incredibly tedious process.
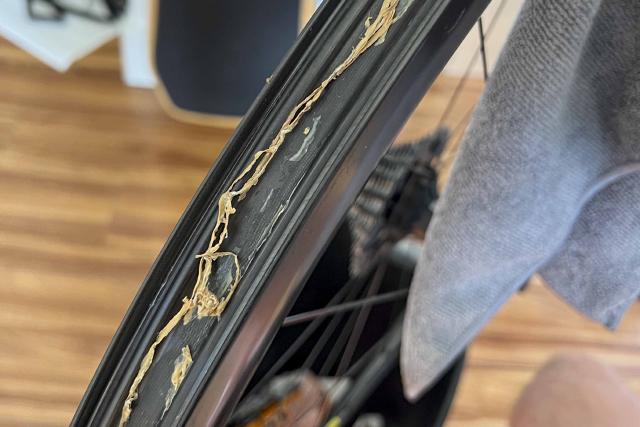
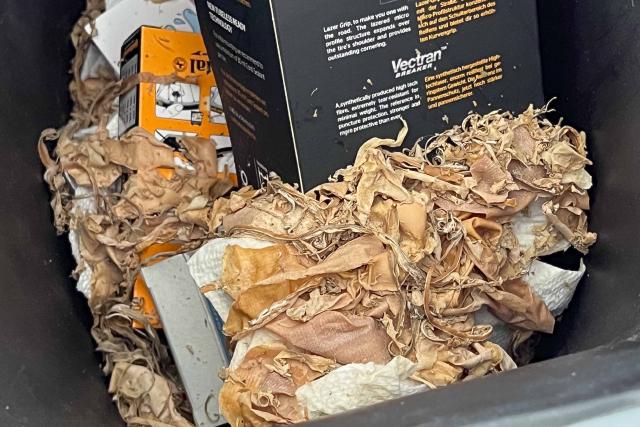
Usually, people remove the valve core on the valve stem (which allows an open gap to the inside of the tire) and pour more sealant in directly using some kind of syringe. It adds more weight to the overall system, sure, but it’s far easier to deal with if you don’t feel like replacing the entire tire.
The Silca stuff, by the way, is a great product that has a separate “replenisher” formula that can be used to extend the time between having to do all of the above. Rather than replacing the sealant entirely, it “replenishes” what is already there, something I probably should have done prior to this ride
If you’ve ever looked at the inner rim bed of your wheels, you’ll notice that most of them have holes for accessing the spokes. It’s how wheels are built. More bike wheels these days come without these holes pre-drilled, as the general trend has been going towards tubeless for road bikes. Holes tend to get in the way of that trend.
So to run tubeless, any holes in the rim bed must be covered by tape. And tape that doesn’t let air through, of course!

The vast majority of my knowledge and experience is for road biking, meaning bikes with skinnier tires that run high pressures. This actually places far different demands on how tubeless tires and sealant works.
Mountain bikes and their tires tend to run larger tires (50mm+) that run lower pressure (<40psi) with more volume of air.
Road bikes and their tires tend to run smaller tires (<30mm) that run higher pressure (60psi+) with less volume of air.
There are a few things that are generally worth while to a lot of people when it comes to running tubeless tires:
The main reason people run tubeless tires is for this reason - you can run tires at lower pressures, which make for a more comfortable ride.
However, running lower pressures mean you run a high risk of “pinch” flats or “snake bite” flats. These are flats that occur when your tire compresses a lot over bumps and the inner tube gets in the way between the tire and the rim, causing a hole on both sides of the tube. Running tubeless tends to negate this problem, as there is no longer a tube that can be pinched.
I think this is far more important in the mountain biking world, as the terrain is vastly different there and the tires themselves run at lower pressures and with higher volumes of air. This means that, by design, the tires and the overall bike is supposed to have more flex to manage the terrain. As road bike tires have trended larger, these two disciplines are starting to converge a bit more, but most people are still running 28mm tires at 60+ psi, anyway.
So this one is different depending on who you ask! Tubeless tires, because of the way they’re mounted to your rim, are often more sturdy when compared to a similarly made clincher-only tire. They tend to be slightly heavier, too, compared to the traditional alternative.
In my experience, this weight savings is either:
Phil Gaimon, a former pro who does a lot on YouTube, has said that he gets far fewer flats while running tubeless (he’s said “1/10th” the number of flats), but a lot of this depends on what kinds of tires you’re using, the tubes themselves, how much you weigh, and generally how you ride. More on that later!
While this is seen as a positive, I’m not so sure it is anymore. Dynaplug is by far and away the leader here, as they make cool “pill capsules” that contain some micro tools you can use to “plug” a hole that never sealed with sealant. This is basically identical to how car tire plugs work.
You use a puncture tool to place a rubberized plug into the hole that won’t seal and then use a small saw to remove the part of the plug that sticks out of the tire. Theoretically, you can run the tire as normal after this for as long as the tire lets you, or until you get another hole that won’t seal.
When tubeless works, it works well. Until it doesn’t.
That’s what happened to me this past weekend. When my sidewall blew out, fixing it basically became suddenly the same as if I had been running clincher tires all along! This meant:
So in the end, despite having plenty of liquid sealant inside my tire, I had to basically change my tire the old school way AND had to deal with a bunch of extra mess, a stiffer tire, and a few extra parts, including unscrewing my very-tightly-screwed-on valve stem.
So suddenly I had no benefits of running tubeless with the added mess of, well, tubeless.
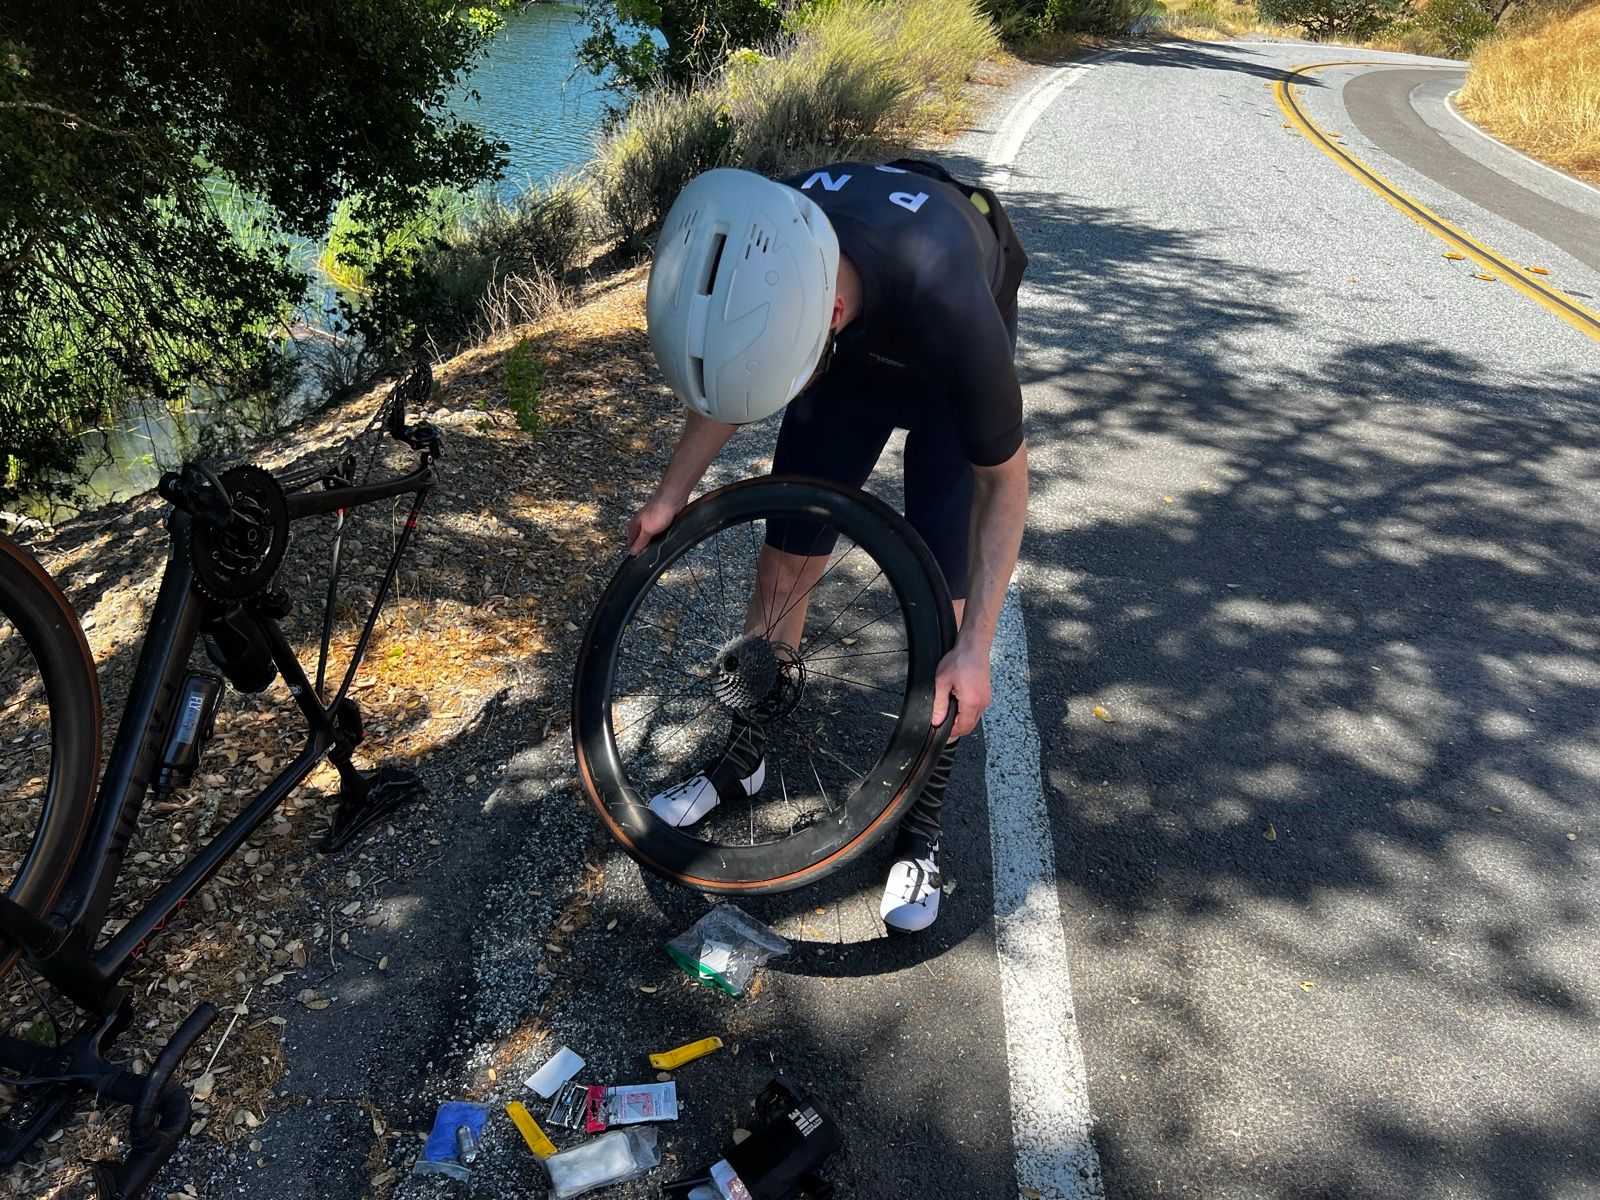
Besides it getting everywhere, it’s generally not recommended using CO2 to inflate a tire that has sealant in it. The cold temperature of the pressurized air can actually freeze most sealant and not actually allow air in to the tire. Or even just freeze your sealant into blobs that don’t actually do anything to help with sealing punctures later.
Which means that you often need to be that guy on the side of the road, furiously pumping air into your tire for a while. A lot of sealants are getting better about this, though, so perhaps this will less of an issue in the future.
Despite having all the parts needed for the job, I didn’t fully anticipate this part. The valve stem for a tubeless tire is a separate part that’s held in place with a nut on the outside of your rim. This is usually part of the inner tube when running traditional clincher tires.
Often, this nut can be screwed on quite tightly, and it’s not often that you will have a set of pliers or something similar to unscrew a part like that if it’s on too tight!
Please don’t forget about this! If you are running tubeless tires, chances are you aren’t really paying too close of attention to what your spare tube is like at the bottom of your saddle bag. If you have deeper profile wheels, make sure you have the right valve stem length on your spare tube!
It feels pretty silly to be out there with all the right tools and a spare tube, but unable to use it because the valve is too short for your wheel.

Sometimes riders will bring valve extenders, but that also requires your spare tube to have a removable valve core, which they often don’t come with. If going this route, you’ll also have to likely purchase and keep with you a valve core removal tool. At that point, you might as well just keep the right length stem tubes with you.
Oh, and make sure to be generous with the valve length - if you have 50mm deep wheels, for example, a 60mm valve stem may not protrude out enough from the wheel to allow you to properly attach to it with a pump.
Note though that this issue isn’t really unique to tubeless, it’s just something that I’ve found requires an extra step of thought once you go tubeless, since swapping out to a tube is a far less common activity.
Tire plugs, as a concept, are awesome. I like the whole idea, and the pill capsule that you can purchase to keep in your saddle bag is super handy. I’ve found that in practice, though, there’s more to the story.
Despite being able to ride on your tire with a plug (or two!) in it, you’ll likely find yourself at some point wanting to replace your tire anyway. Let me explain.
I took my bike in to a bike fitter a few months back after having placed a plug in my rear tire. The trainer that he was using had a roller that the rear tire would roll along as if it were the road. Upon each rotation of the tire, there was a “clink” sound, and it was very obvious that there was something “in” or “on” my tire. My fitter quickly pointed out that this was due to the tire plug.
It bothered me and gave me pause as to whether or not I wanted to replace the tire or not, especially since the reason for needing that plug in the first place was because my sealant hadn’t worked as I had expected it.
So at that point, the tire was mostly worn, with maybe 500 more miles left on it if I was lucky. I didn’t know if it was worth taking the tire off and replenishing it with new sealant, or it was simply easier to put that same sealant into a new tire that I would have more confidence in. I mean, sealant costs money, too!
A few months back when I used a plug in my tire because my sealant was dry (noticing a trend here yet?), I found that the hole in question was actually quite small. Had I had enough sealant in there, it likely should have sealed up just fine. But it didn’t. C’est la vie, right?
But because it was small, I actually had to use another tool in my Dynaplug kit to make the hole bigger. Otherwise, I wouldn’t be able to get the plug in to the hole in the first place (it has a tough brass tip that you use to push through the tire with). This was surprisingly more difficult than I thought it would be, as rubber can be pretty tough when you’re working with a small surface area and a small tool. I also didn’t want to break through the rubber and accidentally damage the carbon rim bed, either.
So what is generally a pretty straightforward fix is actually a bit more work than you may think. Not to mention that while you’re messing with your tire like this, you’re not salvaging any air from the tire, meaning that you still have a lot of work ahead of you to pump the tire up to the pressure you need.
This one is getting easier and easier over time, but the tolerances for tubeless tires are very different than with traditional clinchers (and vary from brand to brand). And since an airtight seal must be achieved to properly mount a tubeless tire to a tubeless rim, extra effort is needed to properly pop the tires into place.
Most bike shops have air compressors that can shoot a huge volume of air into a small space to force the tire into the the rim, usually with a loud “pang” sound (and hopefully not with a “boom” sound). At home, however, you may not have this, and a regular floor pump may not always work out in your favor.
I’ve used an AirShot Tubeless Tire Inflator before with success, but it’s a lot of work because it requires you to pump up the canister to 100+ psi first and then dump it all into the tire at once. You can also use a CO2 canister to do the same thing, but that feels a bit wasteful at times, too.
This one is a relatively recent addition to the cycling industry, and one that I find is still a bit unclear. It’s slightly tangential to the whole tubes and tubeless conversation, but it’s an important item to discuss within that context.
I’m not a mechanical engineering guy, but I generally like the idea of hookless rims and tires. The debate here seems primarily around its safety because there are few additional things to consider here:
Some get a bit controversial in that wheel manufacturers can make hookless rims far easier and with fewer materials (which has actually allowed prices to come down in some cases) while relying on tires to step up their quality standards more than where they were before. So a cost-cutting exercise.
However you slice it, in the event that you need to run more than 73psi in your tires, especially if you’re a heavier rider and are running skinny tires (<25mm) for example, hookless is basically a no-go for you, at least if you plan to remain within manufacturer’s specifications.
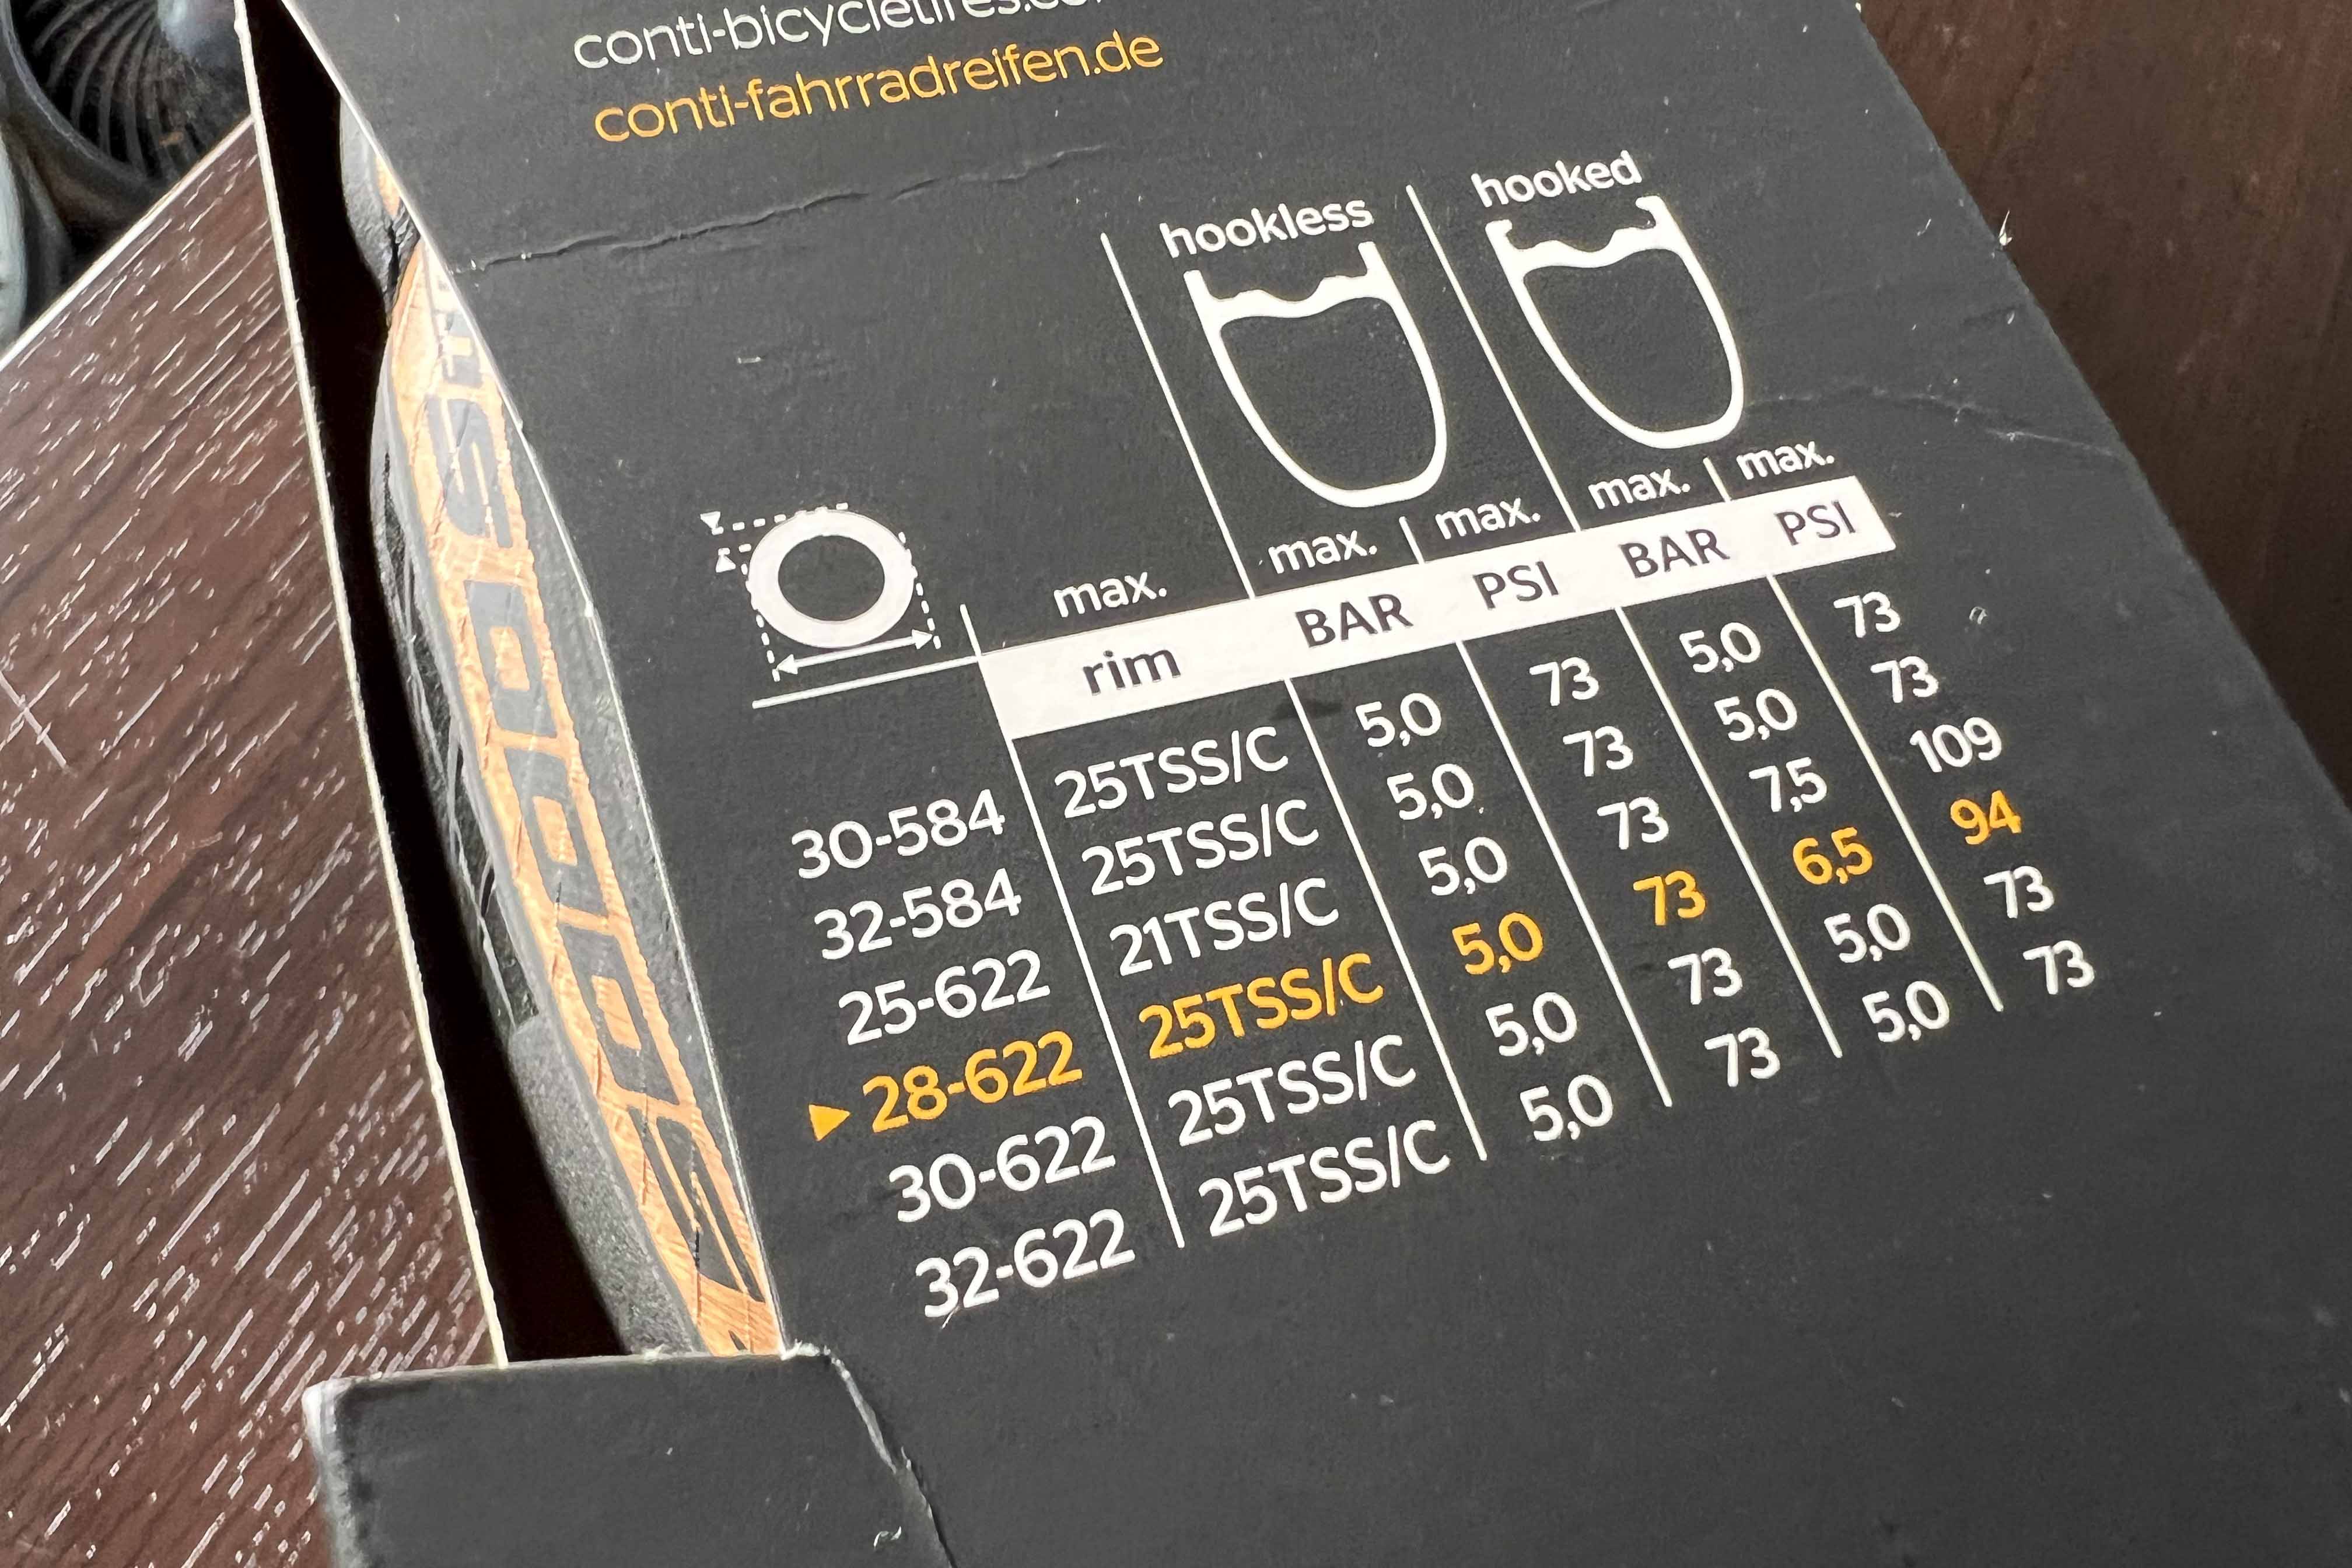
Running a hookless tire on a hookless rim with a tube inside is of course still fine. I’m not sure if the same limits apply in terms of psi though, but this is how I’ve chosen to run my tires at this point.
Basically I have to run tubeless and hookless in everything except that I swap out the sealant for tubes. Is it a net zero effect on the weight? Maybe, I’m not sure yet.
So yeah. A lot there. On the whole, tubeless technology is great, but does require a lot of extra hassle that you don’t normally have when running traditional tubes. And in particular, ongoing hassle -I mean- maintenance.
I think for me, the main issue comes down to where you will have to deal with a puncture or run into a problem.
Personally, I’m a lightweight rider who seems to be relatively balanced front to back on my bike and rarely got punctures prior to going tubeless. I remember doing several multi-mile sections of (easy) gravel on my road bike using 25mm tires (both tires were considered “soft”) without any issue.
I also tend to replace my tires fairly often, every 2500 miles or so, which tends to be about every 6 months given my typical riding.
Unfortunately though, you cannot measure what you cannot track, meaning that I can’t exactly tell you how many tubes I would have punctured when running tubeless. However, I can’t remember the last time I looked at the tread of my tires and saw leaked through sealant that had patched up a hole that I never noticed while riding. So there’s that, anecdotal as it may be!
Changing a tube is a pain, yes. Doing it outside on a ride the “tubeless way”, though, can often end up in an expensive Uber ride home.
And for me, at least for right now, I’d rather run tubes.